skip to Main content
|
skip to Nav
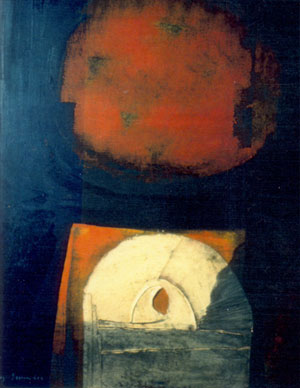
Roger Descombes (1915-1979)
Français
English
Home
Gallery
Biography
Articles
Poems
Contact
Home
>
Gallery
Gallery, image 2 of 12
 Français
 English